When you need help from the Assurestor support desk, you raise a ticket from within My2Cloud. A short guided wizard captures the essentials, you set a priority that governs how quickly we respond, and every ticket is then tracked in the portal from open through to resolved. This guide walks through the whole flow.
Where to find it. Open Support › Tickets from the main menu, at /app/main/support/tickets. You need the tickets permission on your account; if you cannot see the Support area, ask your organisation's administrator.
1. Open the tickets area
The Tickets page lists every ticket raised for your organisation. Along the top are a search box and three dropdown filters (status, time window and type), and on the right is the Create new ticket button. The table shows one row per ticket with its id, priority, type, subject, status, requester and when it was last updated.
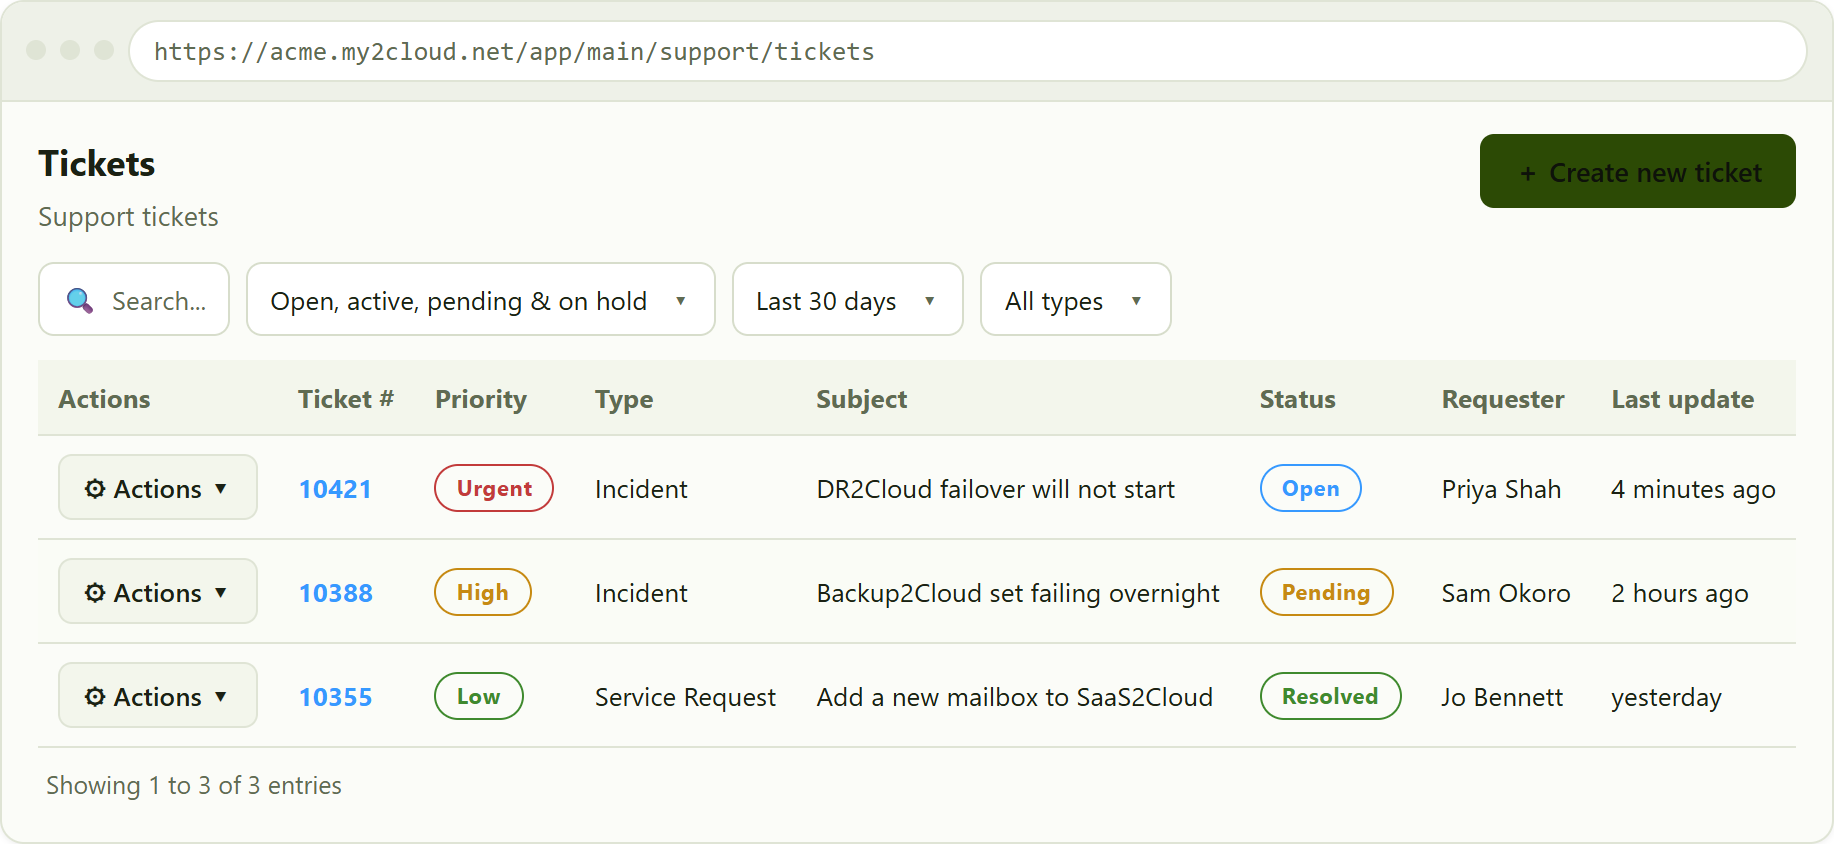
the Tickets list. Priority and status each show as a coloured pill, and the search and dropdown filters narrow what is shown.
Use the filters to focus the list:
- Search matches the ticket number and subject.
- Status switches between All, Open, active, pending & on hold (the default) and Resolved & closed.
- Time window shows tickets updated in the Last 30, 90 or 180 days.
- Type limits the list to a single ticket type, such as Incident or Service Request.
2. Start the ticket wizard
Click Create new ticket to open the guided wizard. It is a four step form, shown as a numbered stepper across the top, and it stays marked Draft until you submit. A live preview on the right updates as you fill each step. You can move back to an earlier step at any time, but moving forward requires the current step to be complete.
The four steps are:
- Start - the base information: type, priority and subject.
- Service - the associated service the ticket relates to.
- Details - a full description and any file attachments.
- Completed - review everything, then submit.
3. Step 1 - type, priority and subject
The first step captures three required fields:
- Type - chosen from a dropdown (for example Incident, Service Request or Question). A short hint explains each type as you pick it: an incident is for when something has gone wrong, a service request is for when you need something performed, and a question is a query rather than an issue.
- Priority - one of Low, Medium, High or Urgent. See the next section for what each level means.
- Subject - a brief title for the ticket (at least a few characters).
If you choose High or Urgent, the wizard shows a reminder to make sure your ticket meets the service level (SLA) rules, with a link to the full rules. Some types set the priority for you: service requests and questions are always logged as Low, so the other options are greyed out.
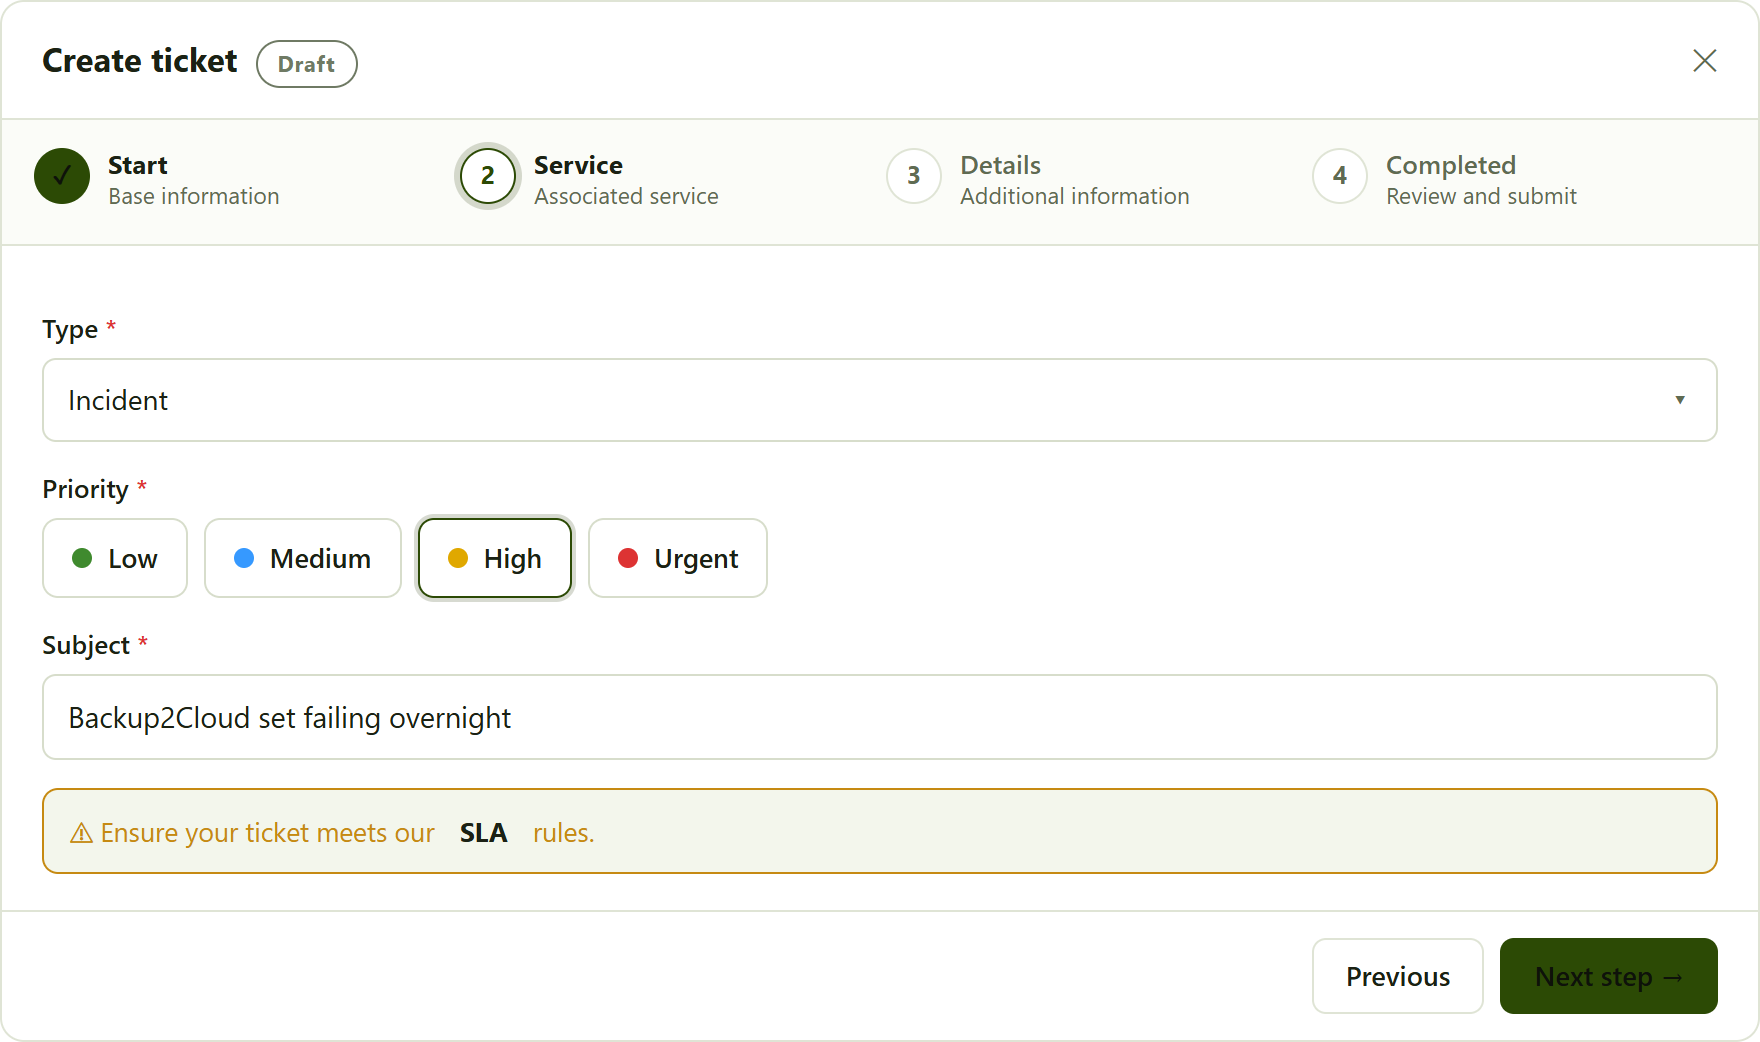
step 1 of the wizard. The stepper tracks progress, priority is a set of coloured chips, and choosing High or Urgent shows the SLA reminder.
4. Priorities and what they mean for response
Priority tells the support desk how urgent your ticket is, and it drives the service level (SLA) target for how quickly we respond. In short, the higher the priority, the faster the target response - so please pick the level that genuinely reflects the impact on your service.
| Priority | Use it when | Response target |
|---|---|---|
| Low | General requests, questions and non-urgent changes with no service impact. | Standard |
| Medium | An issue that affects your service but has a workaround, or is not time critical. | Faster than Low |
| High | A significant problem with major impact and no reasonable workaround. | Prioritised |
| Urgent | A critical outage, such as a service down or a disaster recovery invocation. | Fastest |
The exact SLA targets are set out in our service level rules. Open the linked SLA article from the wizard's High/Urgent reminder, or from the Knowledgebase, for the precise response times that apply to your agreement. Response targets increase with priority, but the published SLA is always the authoritative source.
5. Step 2 - choose the service
The second step asks which service the ticket relates to, chosen from the Product dropdown. Pick the matching service (for example Backup2Cloud, DR2Cloud, SaaS2Cloud or Veeam2Cloud); for anything general, choose the "other" option. This helps route the ticket to the right team.
6. Step 3 - describe the issue and attach files
Give a full description in the rich text box - include what you were doing, what you expected and what happened, plus any error text. Underneath, you can attach files by dragging them onto the upload area or clicking to browse. Each file shows its name and size once added, so you can check you have picked the right one. You can attach up to five files, each up to 5 MB.
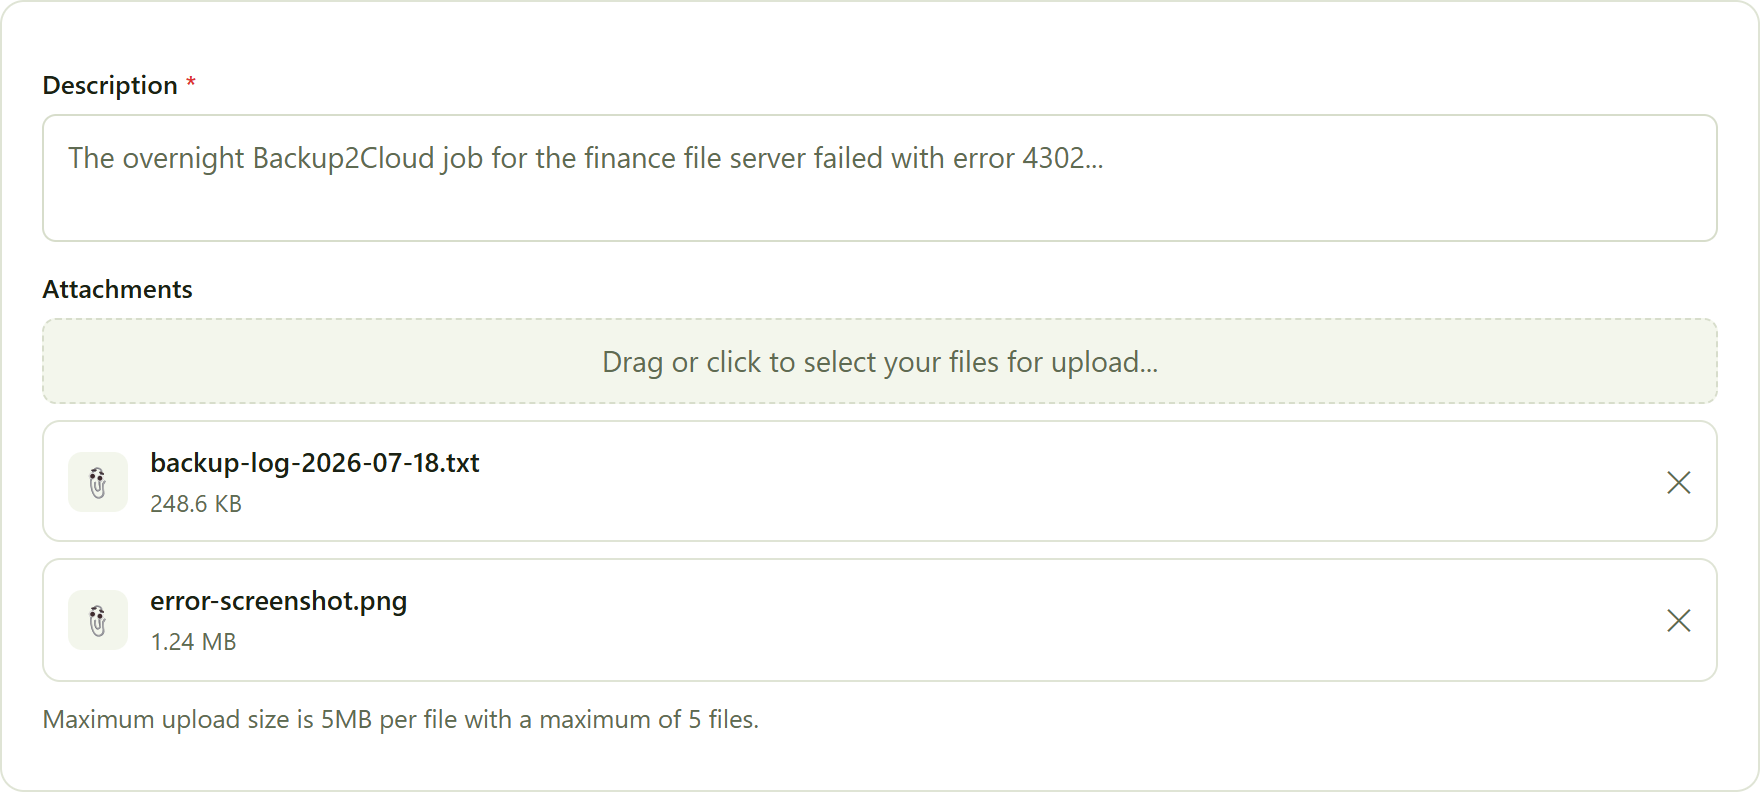
step 3. Each attached file lists its name and size, and can be removed before you submit.
7. Step 4 - review and submit
The final step summarises the ticket: type, priority (as a coloured pill), the related service, the subject and description, and a list of any attachments with their names and sizes. Check it reads well, then click Save to submit. The ticket is only raised with the support desk at this point - up to then it is just a draft. Once submitted you will see a confirmation and the new ticket appears at the top of the list.
8. Tracking a ticket
Back on the Tickets list, every row carries an Actions menu. Choose View (or click the ticket number) to open the ticket, or use Add note, Resolve and Reopen to update it. As a ticket progresses, its status pill changes - the common values are:
Open Active Pending On hold Resolved Closed
Opening a ticket shows the full detail: the status and priority together, the subject, who raised it, and tabs for Details, Attachments and Notes. The Details tab includes a Properties panel (priority, type, service and requester) and a short activity timeline showing when the ticket was created, when we first replied, and when it was resolved or closed. Add a note whenever you have more information for the support desk; use Reopen if a resolved ticket needs more work.
Tips
- Match the priority to the impact. Reserve Urgent for genuine outages and invocations; over-stating priority does not speed up unrelated work and can crowd out true emergencies.
- One issue per ticket. Separate tickets are easier to track and resolve than a single ticket covering several unrelated problems.
- Attach evidence early. Logs and screenshots added at step 3 save a round trip and help us respond within the SLA.
- Keep the list tidy. Use the status and time filters to find historic tickets; switch the status filter to Resolved & closed to review past cases.
Was this article helpful?
That’s Great!
Thank you for your feedback
Sorry! We couldn't be helpful
Thank you for your feedback
Feedback sent
We appreciate your effort and will try to fix the article