In My2Cloud, what a person can see and do is decided by permissions. Rather than set dozens of permissions on every user one at a time, you group them into a role and give the role to your users. This guide explains the difference, and shows how to build a role, tick its permissions and assign it.
Where to find it. Both pages live under Administration in the left-hand menu: Administration › Roles (/app/admin/roles) and Administration › Users (/app/admin/users). You will only see them if your own role includes the relevant administration permissions.
Roles versus permissions
It helps to keep two ideas separate:
- A permission is a single capability, for example "view the Backup2Cloud accounts page", "edit a user" or "delete a role". Permissions are defined by the product; you cannot invent new ones.
- A role is a named bundle of permissions that you create, for example Service Desk or Read Only. Assigning the role to a user grants them every permission the role contains.
A user can hold more than one role, and their effective permissions are the combined total of all their roles (plus any granted directly to them). Because permissions are additive, the tidiest approach is to design a small number of clear roles and assign those, rather than adjusting people individually.
Looking at the roles list
Open Administration › Roles. Each row is a role, showing its Role Name and when it was created. Two badges may appear next to a name:
- Static - a built-in role that the system relies on. Static roles cannot be deleted.
- Default - a role that is given automatically to every new user you create.
Use the Actions button on a row to Edit or Delete a role, and Create New Role at the top right to add one.
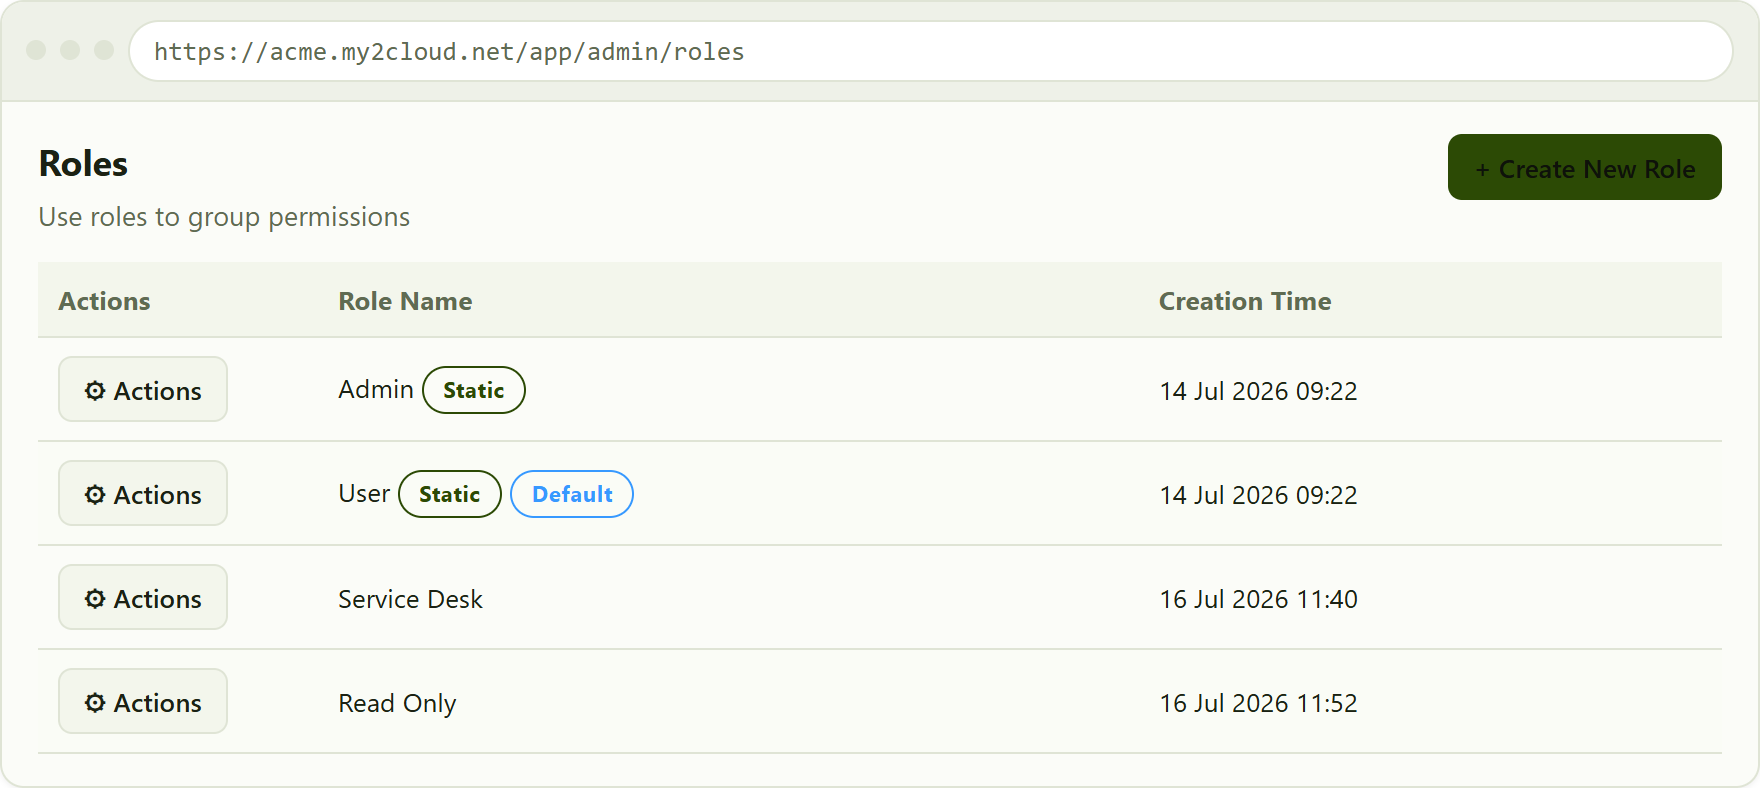
the Roles list. Static roles cannot be deleted; a Default role is assigned to new users automatically.
Create or edit a role
- Click Create New Role (or Actions › Edit on an existing role).
- On the Role Name tab, type a clear Role Name. Tick Default if you want every new user to receive this role automatically.
- Switch to the Permissions tab and tick the capabilities this role should grant (see below).
- Click Save.
Ticking permissions
The Permissions tab shows every permission as a tidy tree, grouped the way the app is (for example Administration, Services, Analytics). Ticking a parent selects the items beneath it, so you can grant a whole area at once or open a branch and pick individual capabilities. A part-filled box means only some children in that group are ticked.
To find something quickly, type in the Search box. Use Expand All / Collapse All to open or close the whole tree, and turn on Only Show Enabled Permissions to hide everything you have not granted, which is handy for reviewing an existing role.
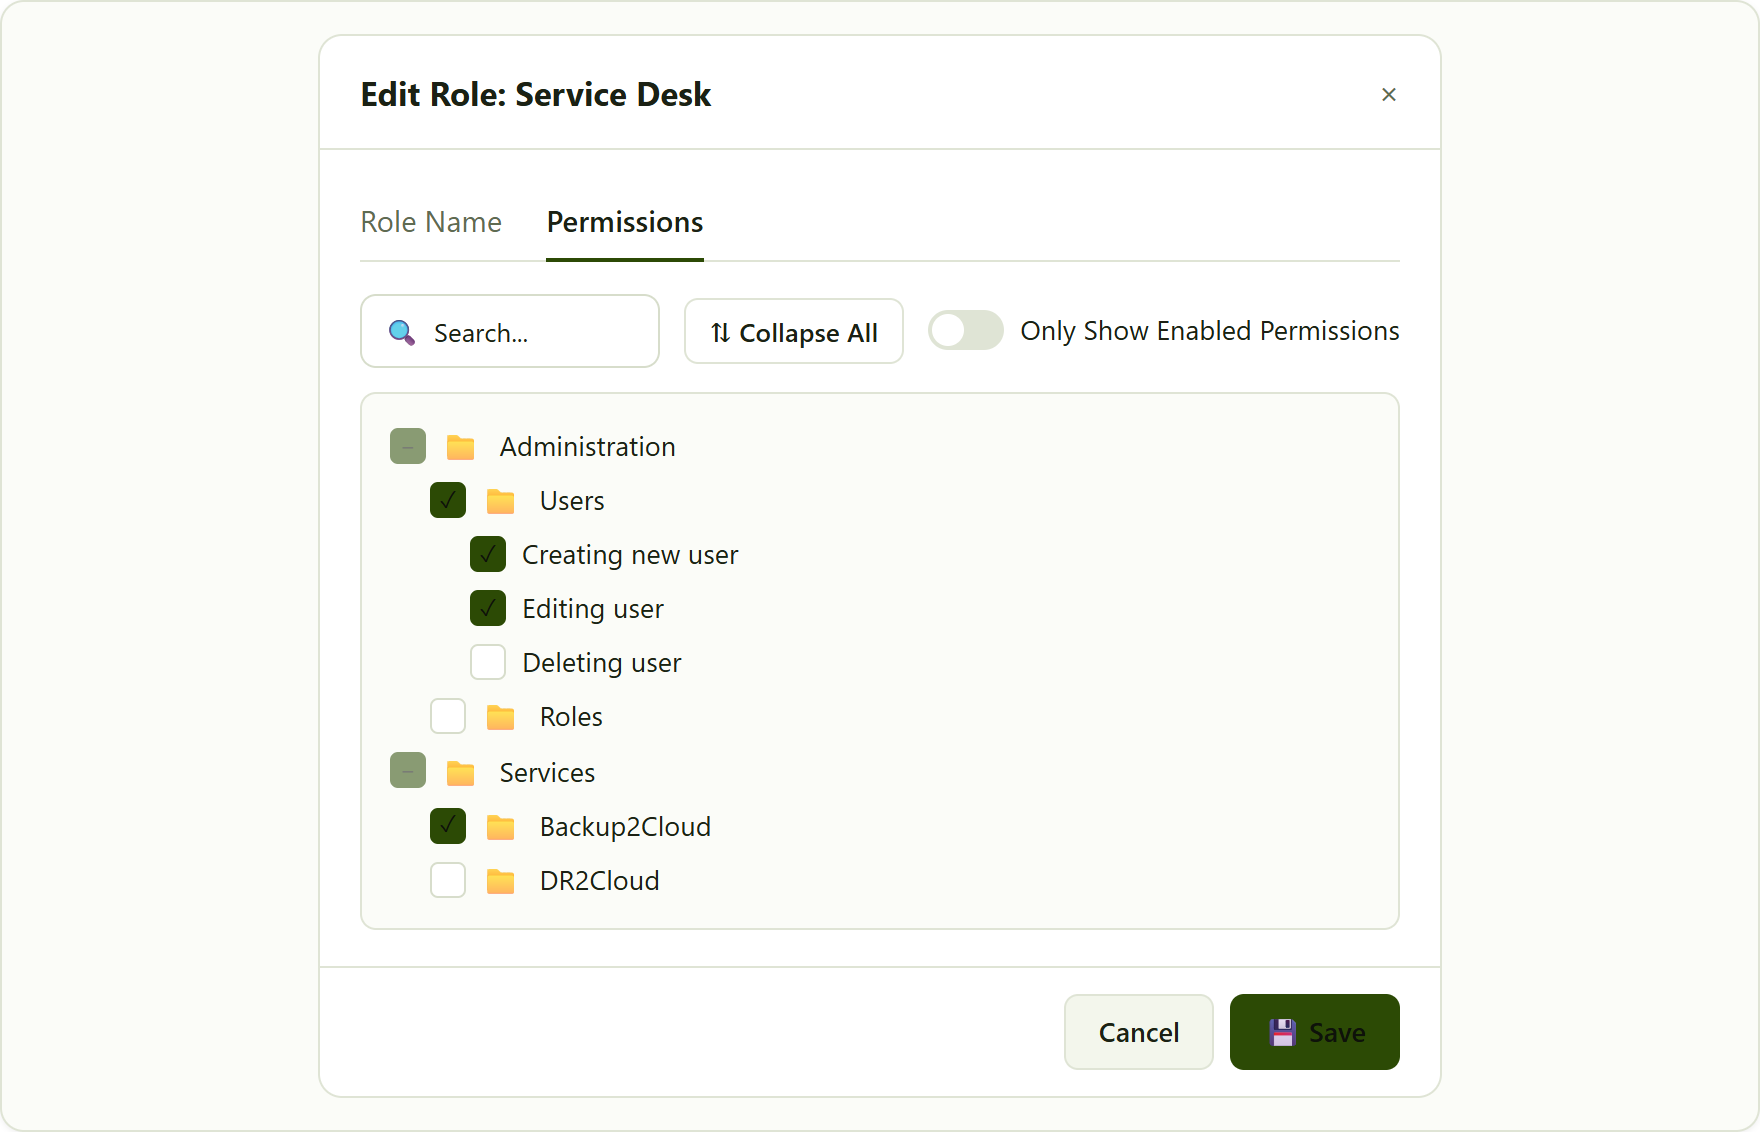
the Permissions tab of a role, with the checkbox tree. Ticking a group selects the items beneath it; a part-filled box means only some are ticked.
Changed your own permissions? If you edit a role you are a member of, you may need to refresh the page (F5) before the change takes effect on your own screen. The portal shows a reminder about this on the role dialog.
Assign a role to a user
Roles do nothing until they are given to people. To assign one:
- Open Administration › Users and choose Create New User, or Actions › Edit on an existing user.
- Go to the Roles tab. The number badge on the tab shows how many roles are currently ticked.
- Tick every role the user should have, then Save.
The Users list shows each person's roles in the Roles column, so you can see at a glance who has what. If a role appears greyed out and cannot be unticked, it has been inherited from one of the user's organisation units and is managed there instead.
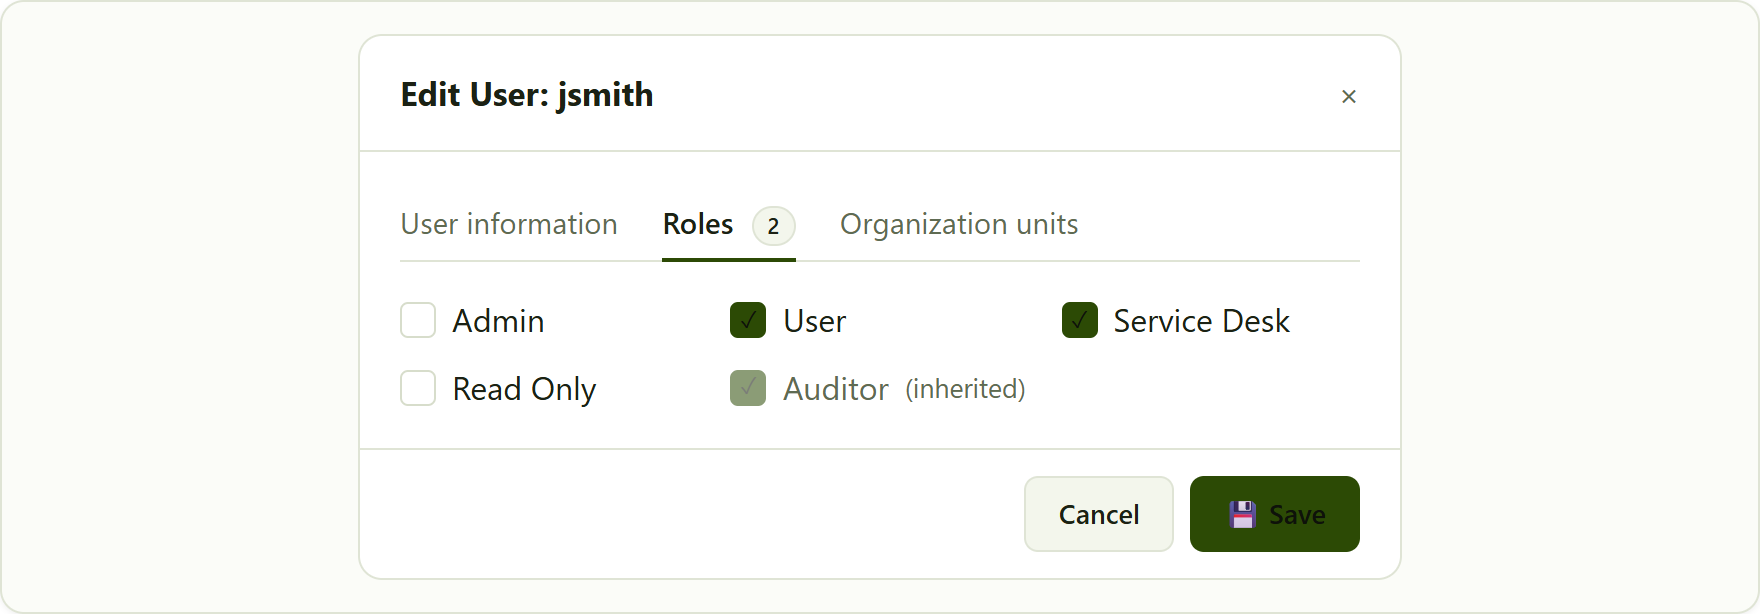
the Roles tab of the Edit User dialog. Tick the roles to grant; a greyed role is inherited from an organisation unit.
How permissions shape the menu and pages
Permissions are not just about the buttons on a page - they decide what a user sees at all. If a role does not grant a permission:
- the matching item is hidden from the left-hand menu, so the user never navigates to it;
- related actions (for example the Create, Edit or Delete buttons on a list) are hidden or unavailable;
- and the underlying page is protected on the server as well, so the data cannot be reached by other means either.
This is why two people looking at the same portal can see very different menus: each menu is drawn from the permissions their roles grant.
Features and permissions: two different switches
Some capabilities need both a permission and a feature before they appear. A feature is a capability turned on for a whole tenant (usually through its edition), while a permission is granted to a role or user. They answer different questions:
- Feature - "is this capability included in this customer's service?" Set per tenant / edition by the host.
- Permission - "is this particular person allowed to use it?" Set per role / user.
For example, the SaaS2Cloud Billing Forecast and Backup2Cloud DS-Client Management are gated this way. The feature must be enabled for the tenant, and the user's role must also grant the matching permission. If the feature is off, the permission has no effect at all; if the feature is on but the permission is not granted, the user still cannot use it. Only when both line up does the capability appear.
In short. Features decide what a tenant's service includes; permissions decide who among that tenant's users may use it. A feature-gated capability needs both switches on.
Tips
- Design a few clear roles (for example Admin, Service Desk, Read Only) and assign those, rather than tuning each user by hand.
- Review a role at a glance by opening it and turning on Only Show Enabled Permissions.
- Mark one role as Default so new users start with a sensible baseline automatically.
- A capability is missing entirely? Check the feature first (is it part of the tenant's edition?), then the permission (does the user's role grant it?).
- A user cannot untick a role? It is inherited from an organisation unit; change it there.
Was this article helpful?
That’s Great!
Thank you for your feedback
Sorry! We couldn't be helpful
Thank you for your feedback
Feedback sent
We appreciate your effort and will try to fix the article