In HYCU an Account is the protected container we create for you, and a source is what that Account actually backs up - an AWS account, a Google Cloud project, or a SaaS application such as Microsoft 365. This guide shows how to add, edit and remove sources from the Sources live view, including the cloud-provider consent steps that hand access to HYCU.
Where to find it. In the left menu open Services → HYCU → Sources (web address /app/main/services/hycu/sources). Source management is opt-in, so the Add source button and the per-row action cog only appear when your organisation has the feature enabled and your role grants it. See "Who can manage sources" at the end of this guide.
A quick note on wording. Throughout HYCU an Account is a HYCU protection set, the container we provision for you. It is not your My2Cloud login. Each Account holds one or more sources, plus the backup target and the policies that decide when and how the sources are backed up.
What a source is
A source is the cloud platform or SaaS application that an Account protects. Adding a source is a two-part idea: your Account is the safe destination (a dedicated storage target with immutable, retained backups), and a source is the origin of the data we copy into it. Until you add at least one source, an Account has nothing to back up.
HYCU supports three kinds of source you can add yourself:
- Amazon Web Services (AWS) - an AWS account, protecting its EC2, EBS, RDS and S3 resources.
- Google Cloud - a Google Cloud project.
- Microsoft 365 and other SaaS applications - a SaaS application chosen from HYCU's catalogue (for example Microsoft 365 Exchange Online, SharePoint, OneDrive or Teams, and many third-party apps). Each application is added on its own.
Every source needs the origin platform to grant HYCU access. The portal always guides you through that grant, but the exact step differs by type: AWS runs a CloudFormation template, Google Cloud runs a Cloud Shell script, and SaaS applications use an OAuth consent window.
The Sources live view
The Sources page lists every source across your Accounts in real time, read straight from HYCU. At the top you will find an Account picker, the search and filter controls, and (when source management is enabled for you) the Add source button. Because the list can span several Accounts, you must choose a specific Account in the picker before adding a source; if you have not, the portal prompts you to select an Account first.
Each row carries an action cog at the end offering Edit and Delete source. You can also reach a scoped Sources view from the live dashboard: clicking the Sources box widget opens this page already filtered to the Account selected on the dashboard.
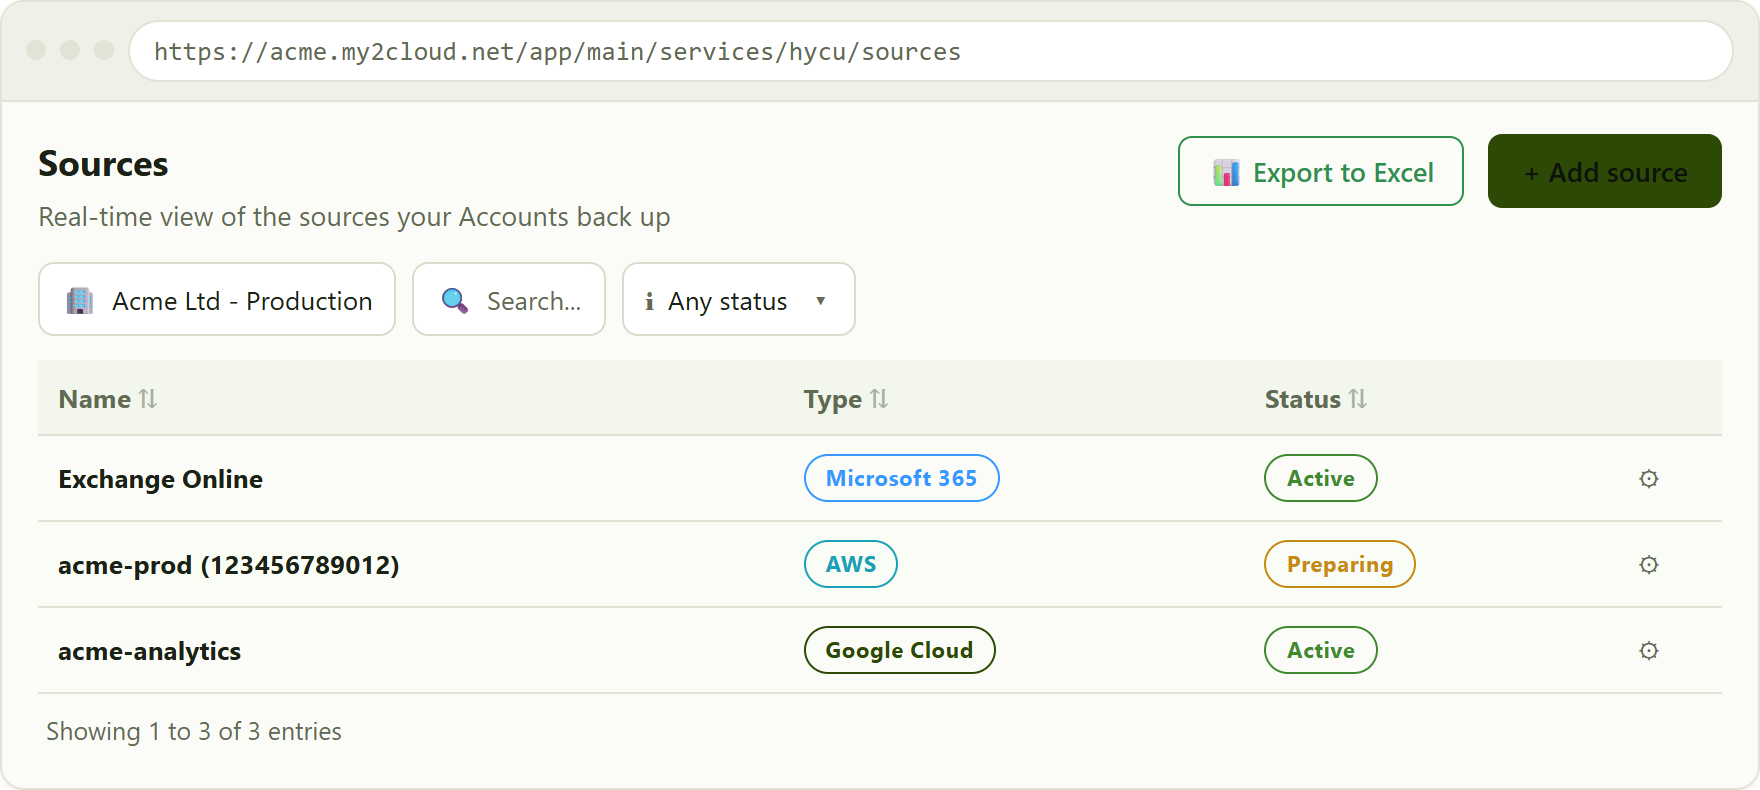
the Sources live view with an Account selected. The cog at the end of each row opens Edit and Delete source. A freshly added source shows Preparing until its grant step is complete.
Adding a source
Select the Account you want to protect in the Account picker, then click Add source. A wizard opens. The first step asks which kind of source you are adding, shown as tiles: AWS, Google Cloud and SaaS. (Azure is on the roadmap and appears once it is available.) The wizard's own guidance sums up the flow: "Choose the type of source to add to this Account. The cloud provider then guides you through granting HYCU access."
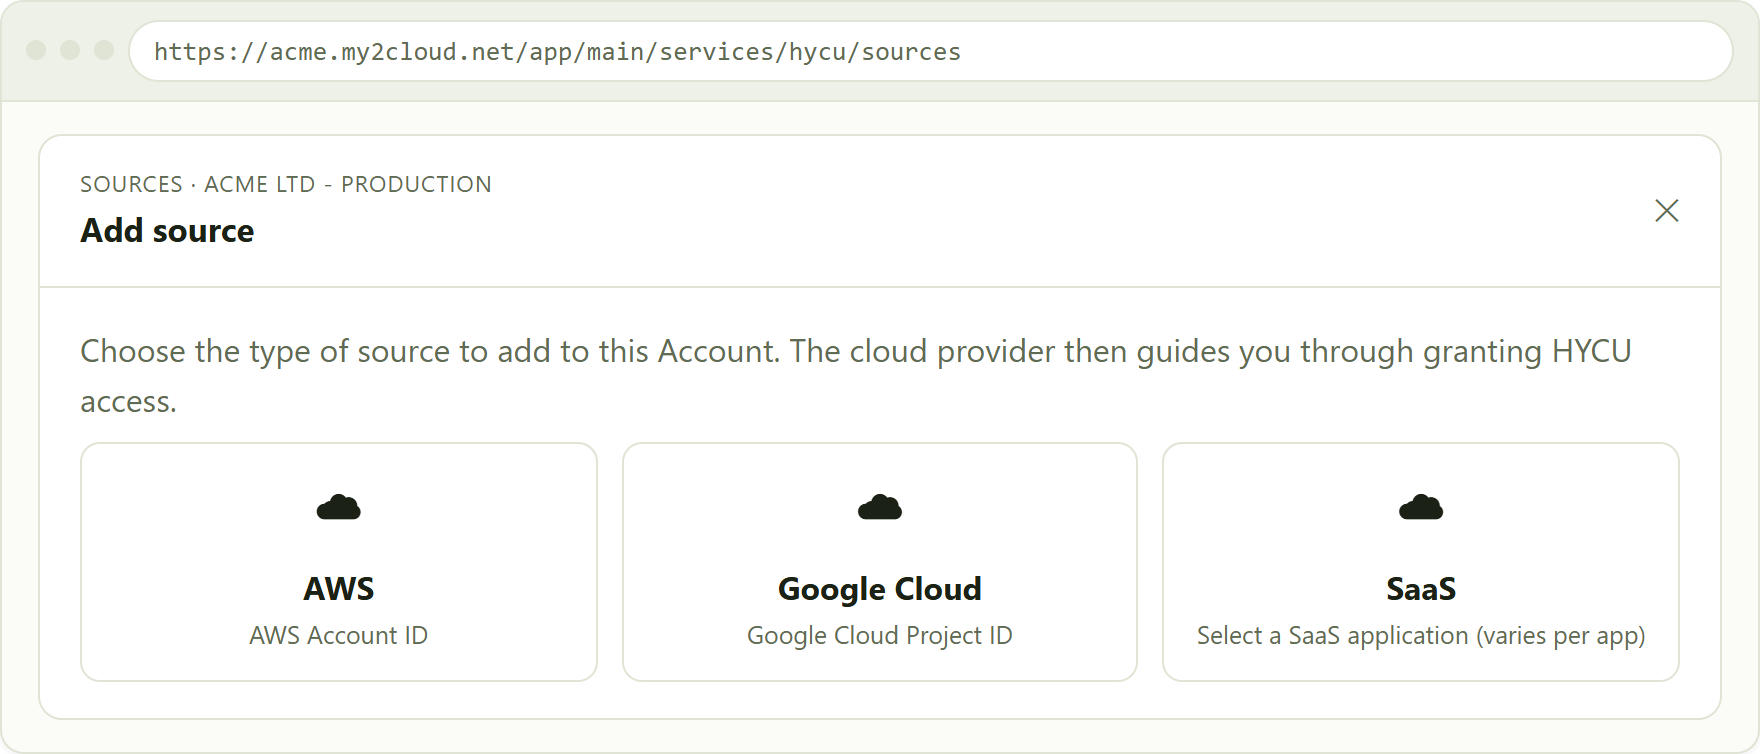
step one of the Add source wizard, choosing the source type. Each tile shows the credential or identifier that type needs.
Amazon Web Services (AWS)
Choose the AWS tile. On the form, enter your AWS Account ID (exactly 12 digits; the portal keeps the field numeric as you type and warns if the length is wrong) and an optional display name. Where your Account has a data mover configured, you can tick Use data mover configuration and pick one; if the Account has a single data mover it is selected for you.
When you click Add source, the portal creates the source in HYCU and returns an AWS CloudFormation quick-create link. Open that link (or copy it) and run the stack in your own AWS account. It creates the cross-account IAM role that HYCU uses to reach your resources. Until you complete that step in AWS, the source stays in a Preparing state.
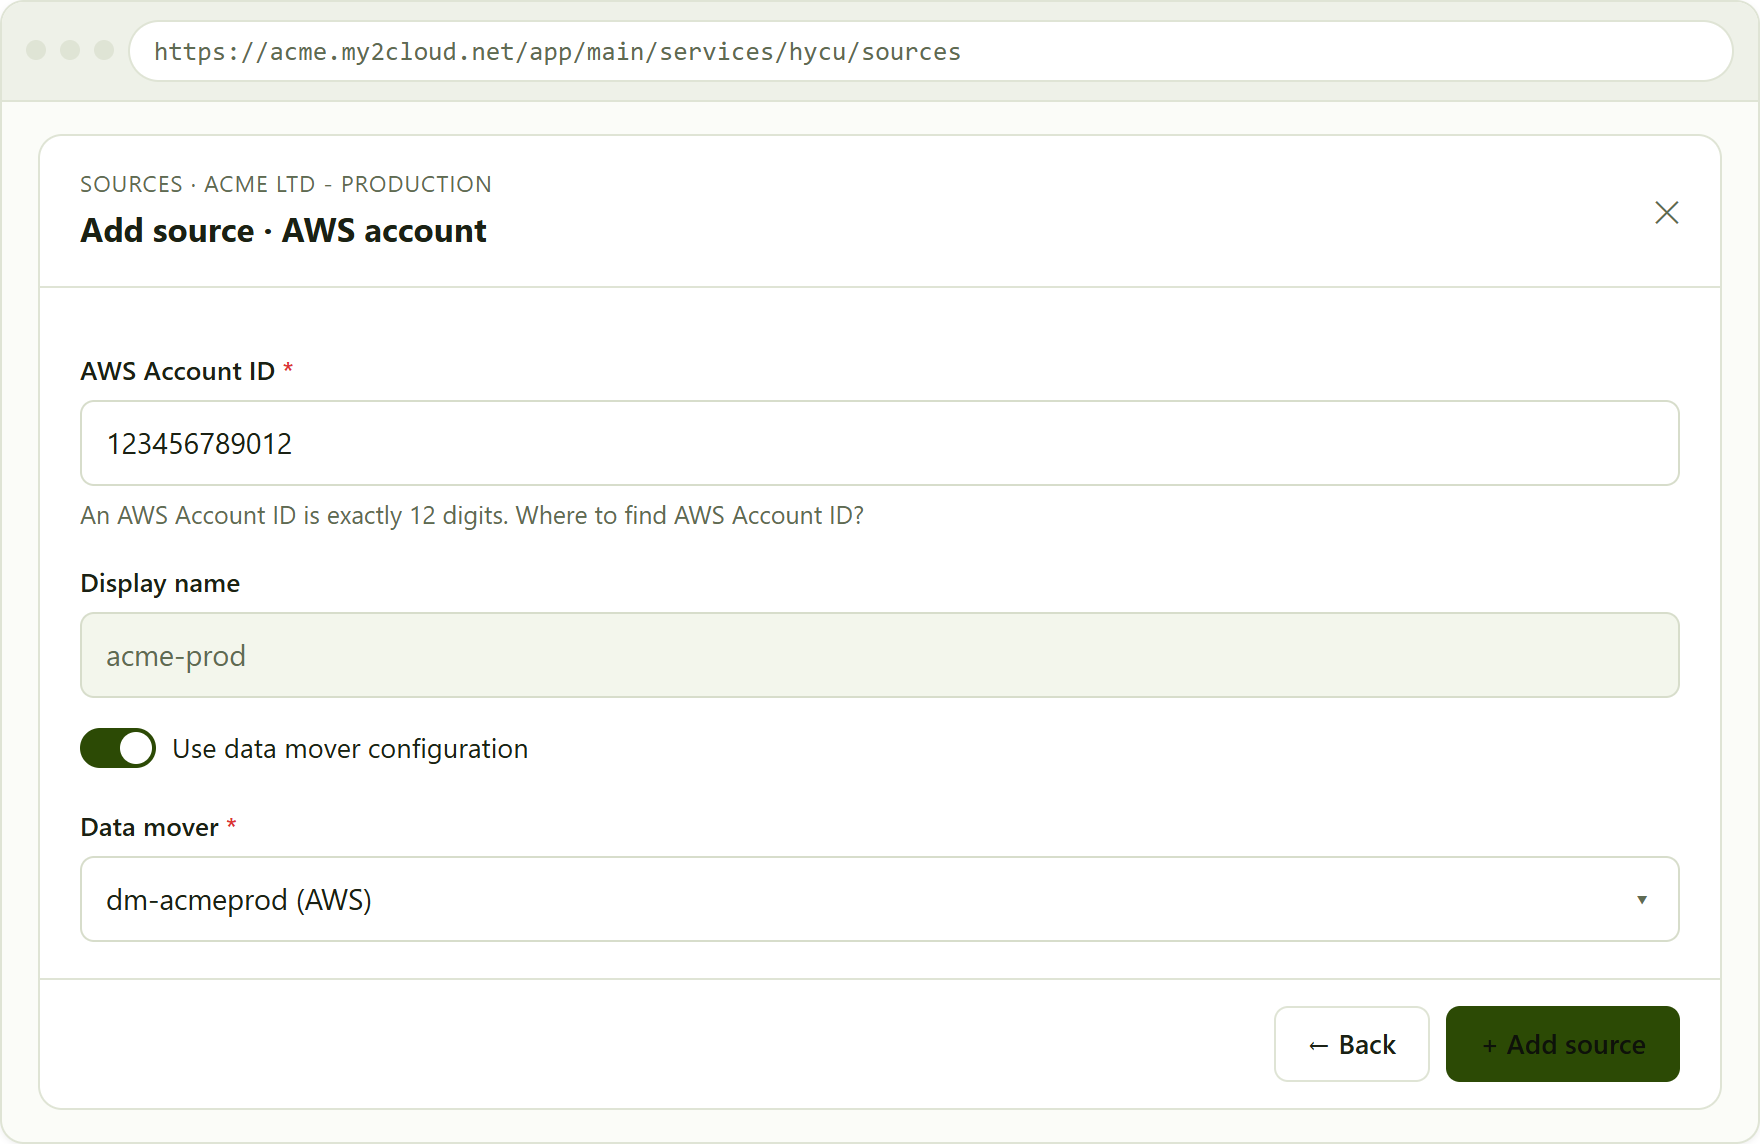
the AWS source form. After adding, the wizard shows a CloudFormation link to run in your AWS account so HYCU can access it.
Google Cloud (GCP)
Choose the Google Cloud tile and enter your Google Cloud Project ID. On adding, the portal returns two things: a Cloud Shell link to run a script in your project that grants access, and a HYCU managed service account that you grant the required roles on your project. Copy or open the link and follow it through in Google Cloud. As with AWS, the source stays in a preparing state until the grant is complete.
Microsoft 365 and other SaaS applications
Choose the SaaS tile. The wizard then loads HYCU's live catalogue of SaaS applications, so pick the one you want from the SaaS application dropdown (for example a Microsoft 365 module such as Exchange Online). The rest of the form is schema-driven: it renders exactly the fields that application needs. Most take a display name and one or two identifiers (for Microsoft 365 that is your Entra tenant id), an Application credential to register against, and an optional data mover. Some applications add dropdown or choice fields, for example an environment choice, which the form presents as a select.
Because SaaS applications authenticate with OAuth, the final button is Grant consent and add. Clicking it opens a consent window where you sign in to the application and grant the requested permissions. The portal watches that session and, once you have consented, completes the registration automatically and creates the source. If the sign-in window is closed without granting, the add does not complete.
Keep the consent window open. The portal waits for the consent handshake to finish (it can take up to a minute or two). Do not close the wizard while it shows "Awaiting consent...". A small number of applications use their own credential fields instead of an OAuth window; for those the wizard adds the source directly with no popup.
Editing a source
From the Sources list, open a row's action cog and choose Edit. The edit modal lets you change the source's display name and its data mover choice (turn Use data mover configuration off to clear it, or pick a different one). Google Cloud sources have no editable name, so that field is hidden for them.
For SaaS sources the modal also shows the Application credential it is registered against, with its status, and a Regrant consent action. Use Regrant consent when an application's consent has expired or been revoked and backups have started failing on authorisation. It re-authorises the source's application credential: a consent window opens, you grant it again, and then you click Save to apply the refreshed consent. The portal's own hint puts it plainly: "Re-authorise this source's application credential. A consent window opens; grant it, then Save."
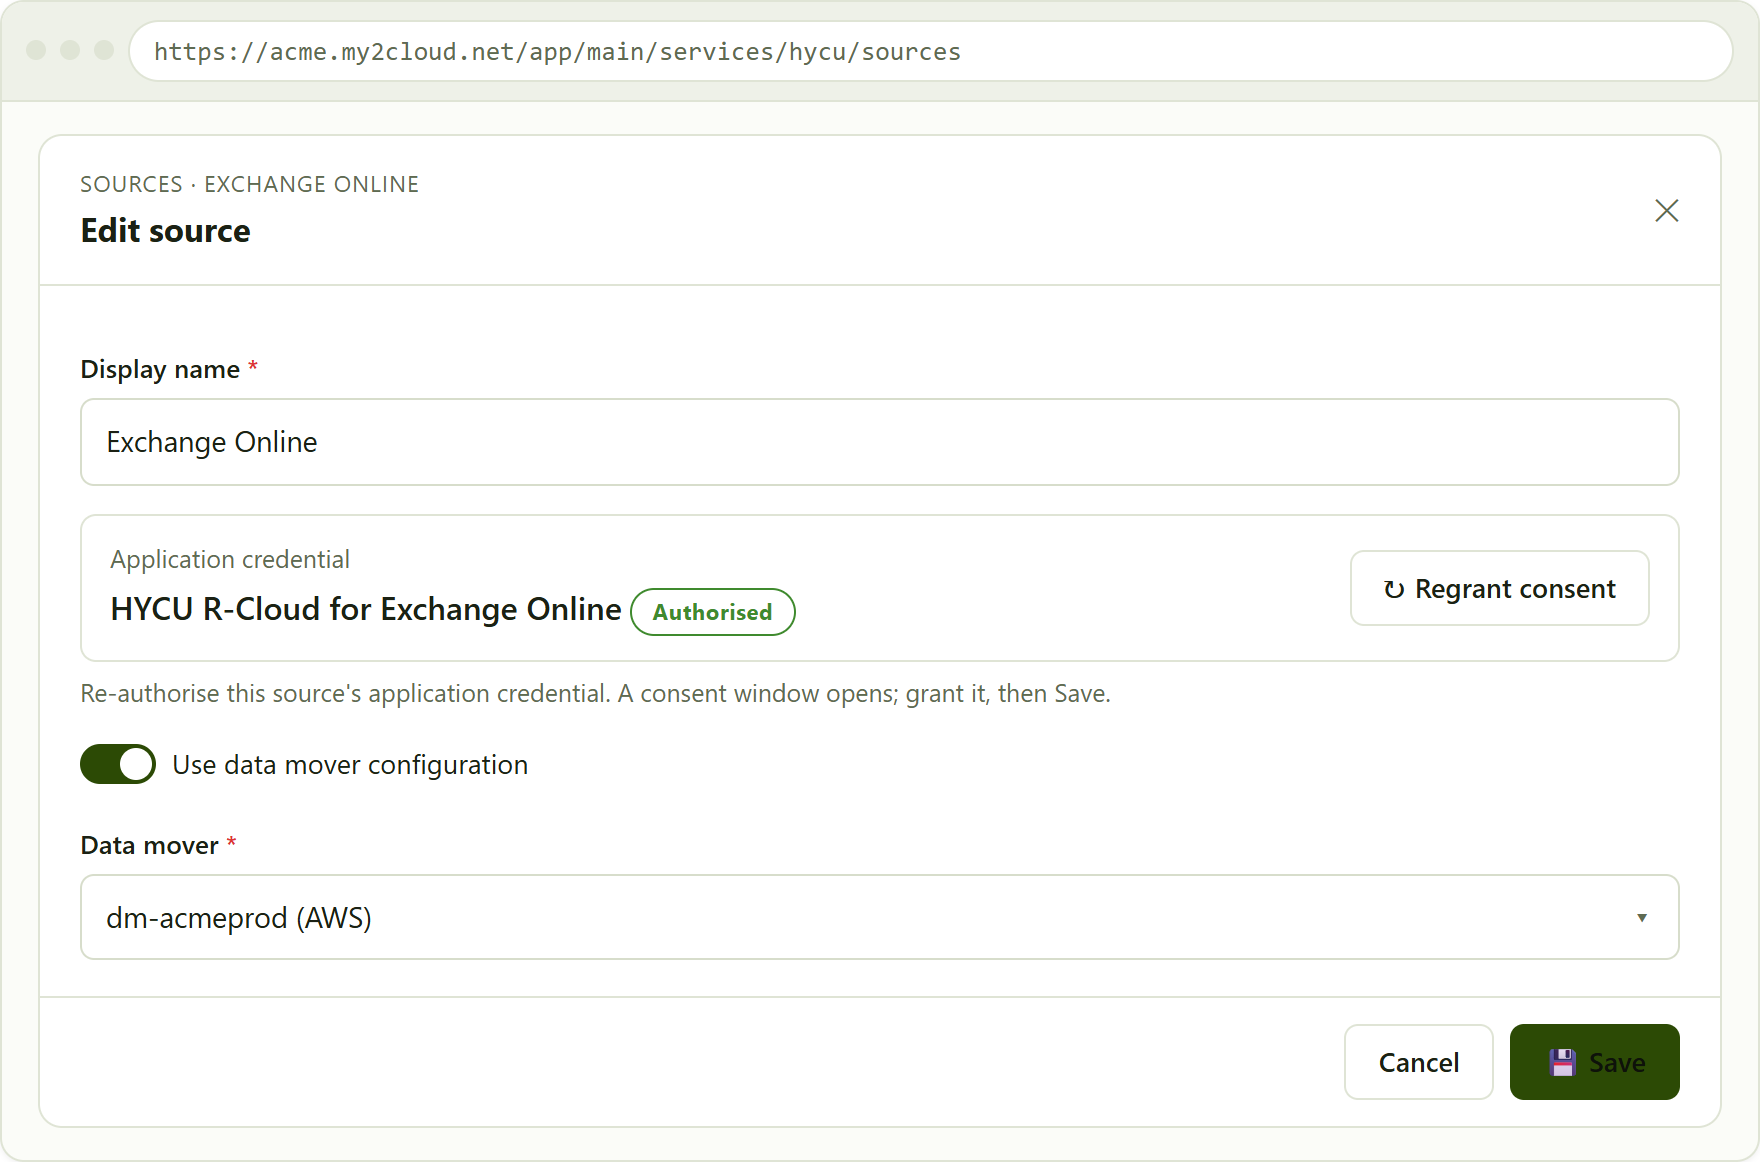
the Edit source modal for a SaaS source, showing the application credential panel and the Regrant consent action used to refresh an expired or revoked consent.
Deleting a source
To remove a source, open its action cog and choose Delete source. Because deleting stops that source's protection and cannot be undone, the action is protected: the confirmation dialog asks you to prove who you are. If two-factor authentication is on for your account you enter your authenticator code; if it is off you enter your password. My2Cloud re-checks this on the server, so the deletion only proceeds once your identity is verified.
Deleting a source that still holds backups is not instant. HYCU protects against accidental data loss with a two-stage guard, so a source with existing backups cannot simply be removed. First its policies must be unassigned from the protected entities, and then its restore points must be expired and allowed to age out under retention before the source can finally be deleted. My2Cloud passes HYCU's exact message back to you rather than silently forcing this through, so if you try to delete a source that still has valid restore points you will see a message telling you to expire them and wait for the next retention maintenance to run. Plan for this: removing a fully protected source is a process that takes time, not a single click.
A source that has no backups yet (for example one still in the preparing state, or one whose backups have already aged out) deletes straight away after the identity check. Deleting a source removes it from the Account; the Account, its target and its policies remain.
Who can manage sources
Source management is gated by the Sources.Manage permission (shown in the role editor under the HYCU service), which in turn depends on the HYCU Account Management feature. Both are opt-in and off by default, so a tenant only gets self-service source management when Assurestor enables the feature and an administrator grants the permission to the relevant roles. With the permission, users see the Add source button and the per-row Edit and Delete actions; without it, the Sources page stays read-only.
Triggering an on-demand backup is governed separately by its own Manual Backup feature and permission, so a role can be allowed to manage sources without also being able to start backups, and vice versa.
Related articles
Sources are one part of getting an Account protecting data. For how Accounts (protection sets) are created and what HYCU is for, read "HYCU: overview and getting started". For how backups are scheduled and retained once a source exists, and how to assign or set a default policy, read "HYCU backup policies". Together those three cover the full journey: create the Account, add its sources, then apply the policies that back them up.
Was this article helpful?
That’s Great!
Thank you for your feedback
Sorry! We couldn't be helpful
Thank you for your feedback
Feedback sent
We appreciate your effort and will try to fix the article