A backup policy decides how often your HYCU data is protected, where the backups are kept and how long they are retained. This guide covers the Policies live view, the per-policy cog menu (create, edit, set as default, delete), and how a policy is assigned to the things it protects, along with running an on-demand Backup now. These are self-service management actions, so which of them you see depends on the capabilities your organisation has been given.
Where to find it. Open Services → HYCU → Policies (web address/app/main/services/hycu/policies). Assigning a policy to individual items, and Backup now, live on the SaaS live view (/app/main/services/hycu/saas). The management actions appear only when your organisation has the matching capability enabled - see Who can manage policies.
A quick note on wording. In HYCU an Account is a HYCU protection set - the container that holds your sources, their backup target and the policies that apply to them. An entity is one backed-up item within a source, such as a single mailbox, SharePoint site or bucket. A policy is the schedule and retention rule you attach to those entities.
What a backup policy is
Every HYCU Account is provisioned with a starter policy called daily - a daily backup to your Account's immutable cloud target, retained for twelve months. That policy is set as the Account's default, so anything new that appears in a source is protected automatically without you having to do anything.
You can go further and create your own policies to suit different data. A policy carries:
- a name and an optional description;
- a backup schedule - how often the backup runs (for example every 1 day);
- a retention - how long each backup is kept (for example 12 months);
- a backup type - either Backup to Target (a full copy written to your immutable cloud target) or Snapshot Only;
- for a Backup to Target policy, the target the backups are written to.
One policy can protect many entities, and each Account can hold several policies. There is also a built-in exclude policy: assigning it to an entity means "do not back this up". The exclude policy is part of the platform and cannot be deleted.
The Policies list
The Policies page lists the policies for a chosen Account. Because the page can span more than one Account, pick an Account in the filter row first; the list then shows that Account's policies. The default policy is marked with a star beside its name. Each row also shows how many entities of each kind the policy currently protects, drawn as a small bar so you can compare at a glance.
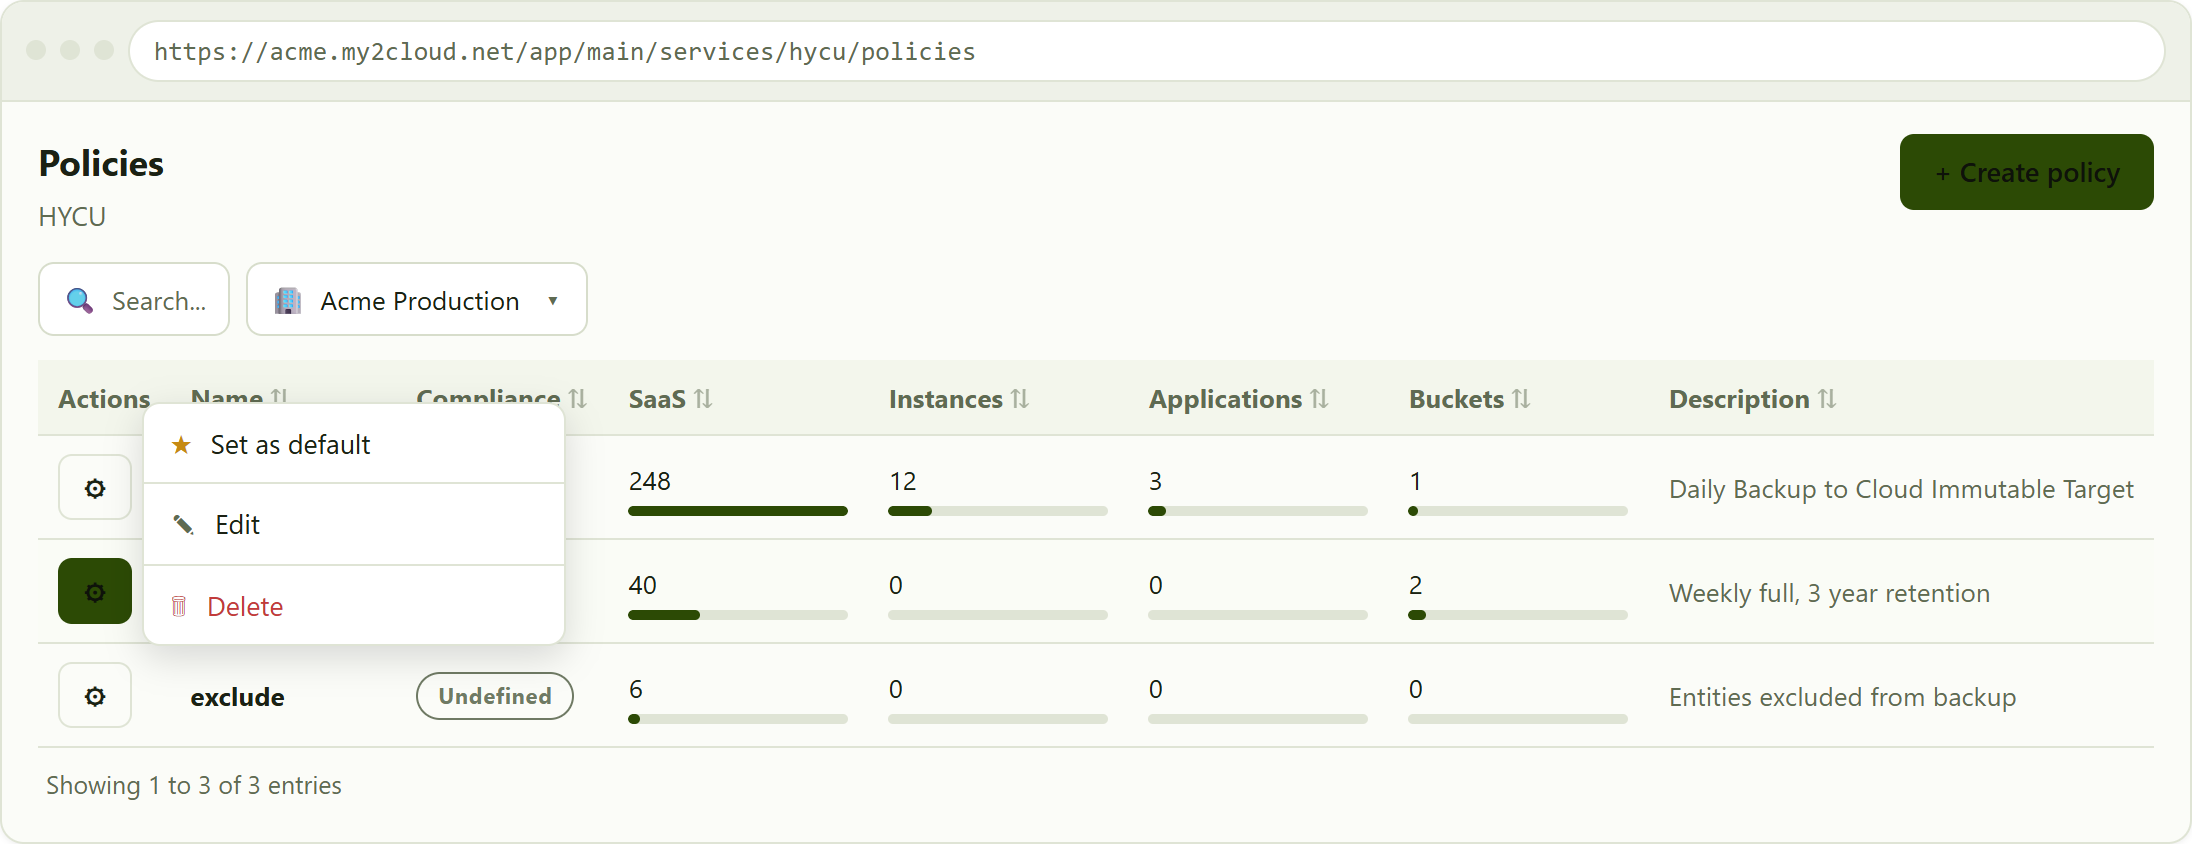
the Policies list with the per-row cog action menu open. The default policy carries a star; the exclude policy has no Delete option.
The cog action menu
Each row has a cog button that opens its action menu. Which items appear depends on the policy and on your permissions:
- Set as default - make this the Account's default policy (shown when the policy is not already the default).
- Clear default - shown instead of "Set as default" when the policy already is the default, so you can remove that status.
- Edit - change the policy's schedule, retention, type or target.
- Delete - remove the policy. Shown in red, and never offered for the built-in exclude policy.
Creating a policy
Select an Account in the filter row, then click Create policy. If no Account is selected you are prompted to "Select an Account (protection set) first to create a policy", because a policy always belongs to one Account. The themed create modal opens with an empty form.
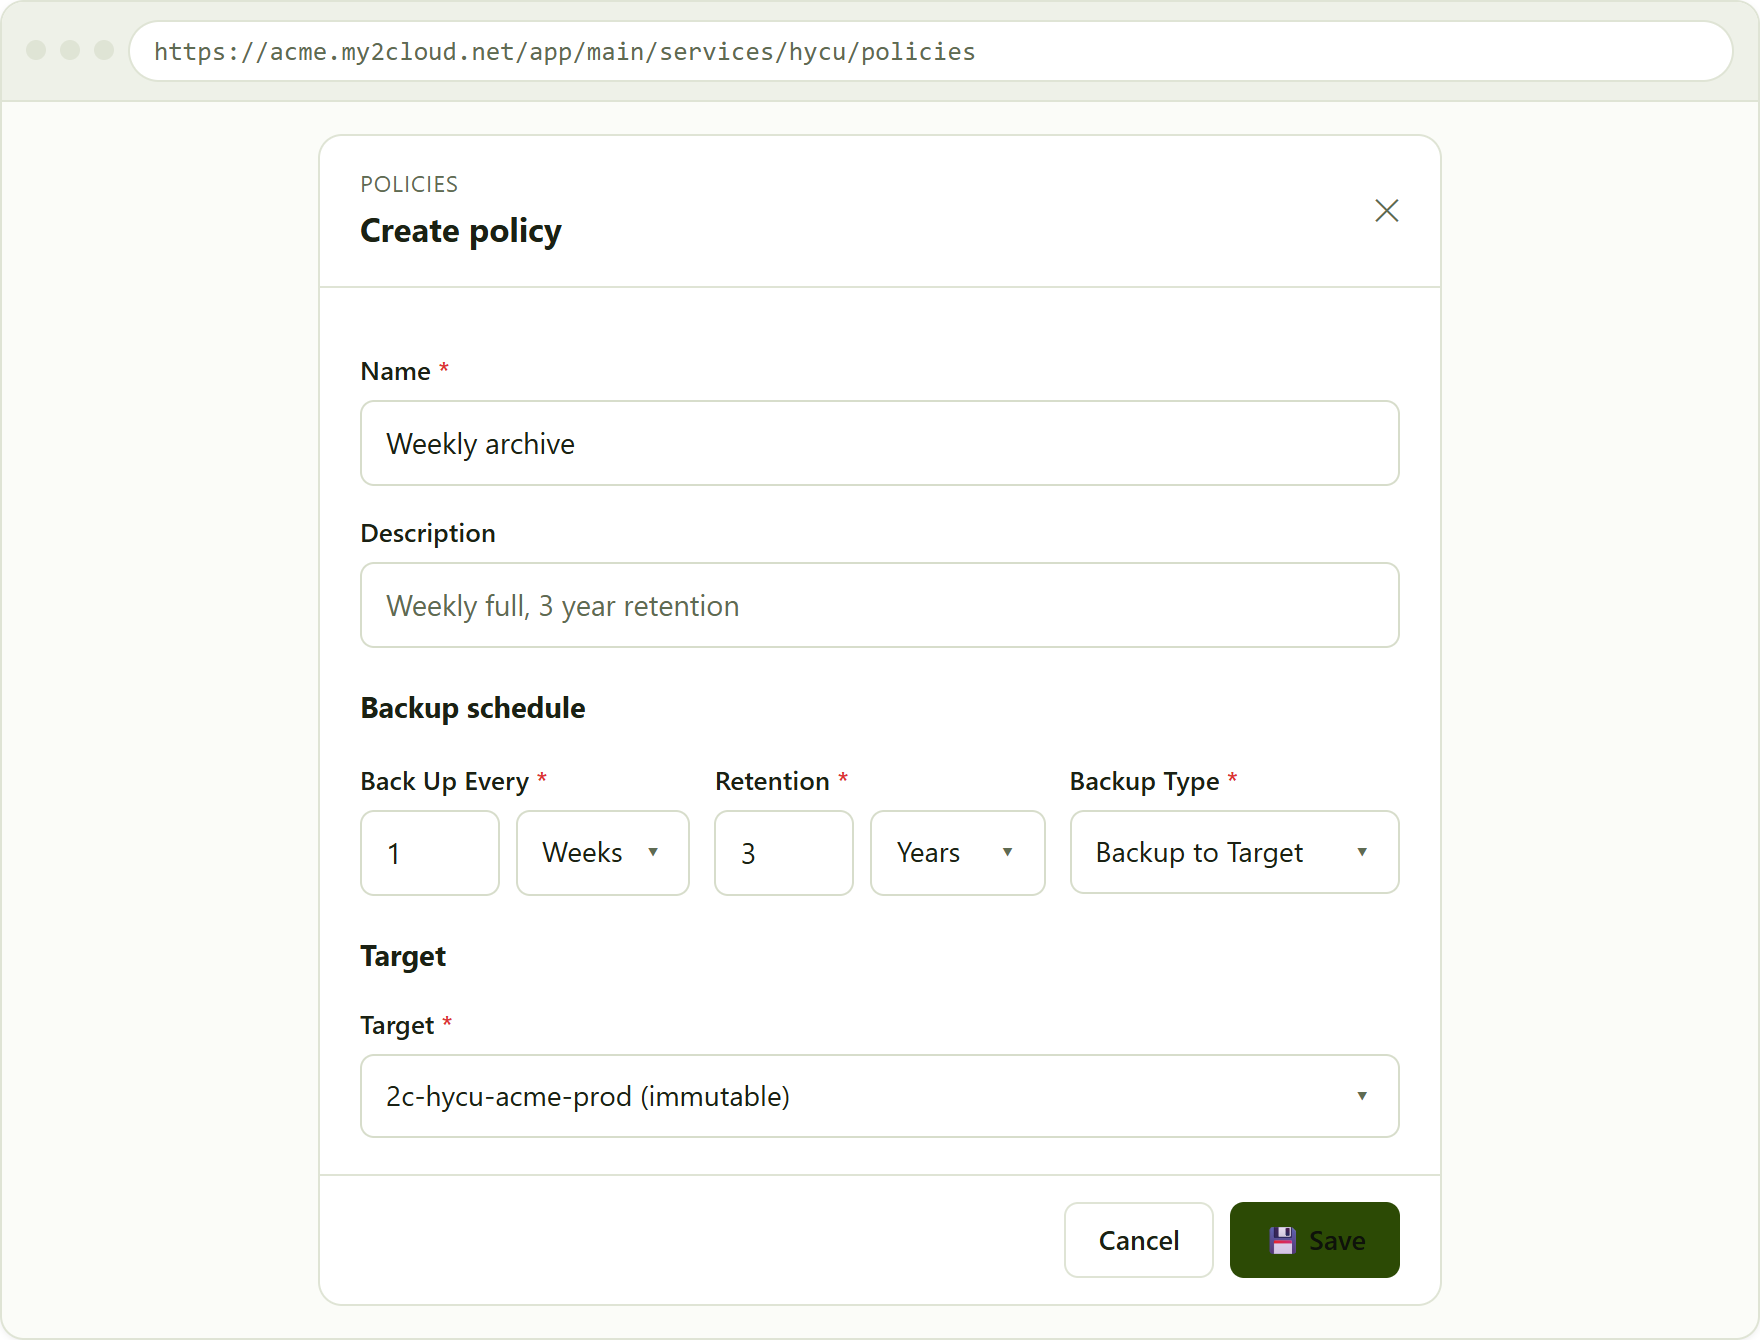
the Create policy modal. Choosing Snapshot Only in Backup Type hides the Target section.
Fill in the form and click Save:
- Name (required) and an optional Description.
- Back Up Every (required) - a number plus a unit, giving the schedule (for example every 1 day, or every 1 week).
- Retention (required) - a number plus a unit, giving how long each backup is kept.
- Backup Type (required) - Backup to Target or Snapshot Only.
- Target (required, Backup to Target only) - the immutable cloud target the backups are written to. This field is hidden when the type is Snapshot Only.
Editing a policy
Open a policy's cog menu and choose Edit. The same modal opens, pre-filled with the policy's current settings, and its title reads Edit policy. Change any of the fields and click Save. Editing a policy re-applies its schedule and retention to every entity already assigned to it, so a change here can affect a lot of data at once - review it before saving.
Set as default and Clear default
The default policy is the one applied automatically to anything in the Account that does not have a policy of its own. Only one policy is the default at a time.
Choosing Set as default from the cog menu opens a short modal where you decide how widely the default is applied:
- Resources - tick the resource types the default should cover: Instances, Applications, Buckets and SaaS.
- Assign to resources without policy - a toggle that, when on, immediately applies this policy to any of the chosen resources that currently have no policy assigned.
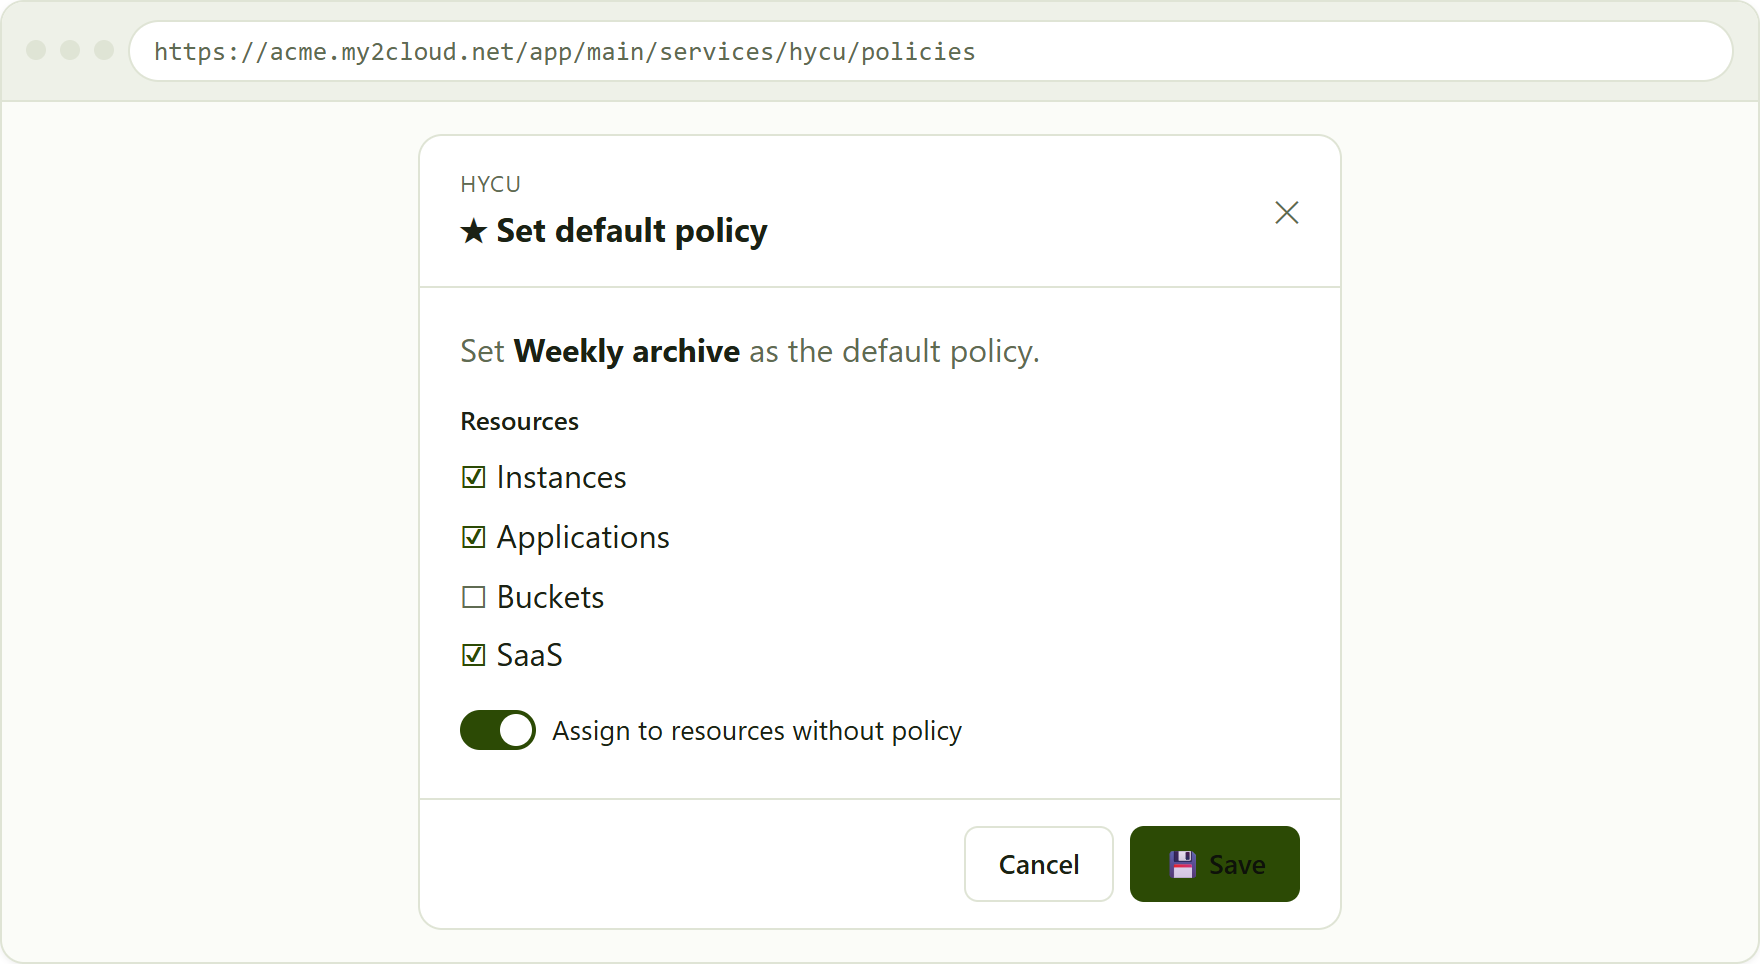
the Set default policy modal, with resource checkboxes and the assign-to-unassigned toggle.
When the policy is already the default, the cog menu shows Clear default instead. Choosing it asks you to confirm - "Clear [name] as the default policy for this Account?" - and, once confirmed, the Account is left with no default until you set one.
Deleting a policy
Deleting a policy is a protected, destructive action. From the cog menu choose Delete to open the confirmation modal. Because removing a policy stops future backups for anything using it, you must confirm your identity before it will proceed - the server re-checks this as well as the page, so it cannot be bypassed:
- if you have two-factor authentication switched on, enter your current authenticator code;
- if two-factor is off, enter your account password.
Two safeguards apply. First, if the policy is still assigned to entities, the modal warns you: "This policy is assigned to one or more entities. If you delete it, no further backups will be performed for them." Second, the built-in exclude policy cannot be deleted at all - the Delete option is not offered for it, and the request is refused server-side even if attempted.
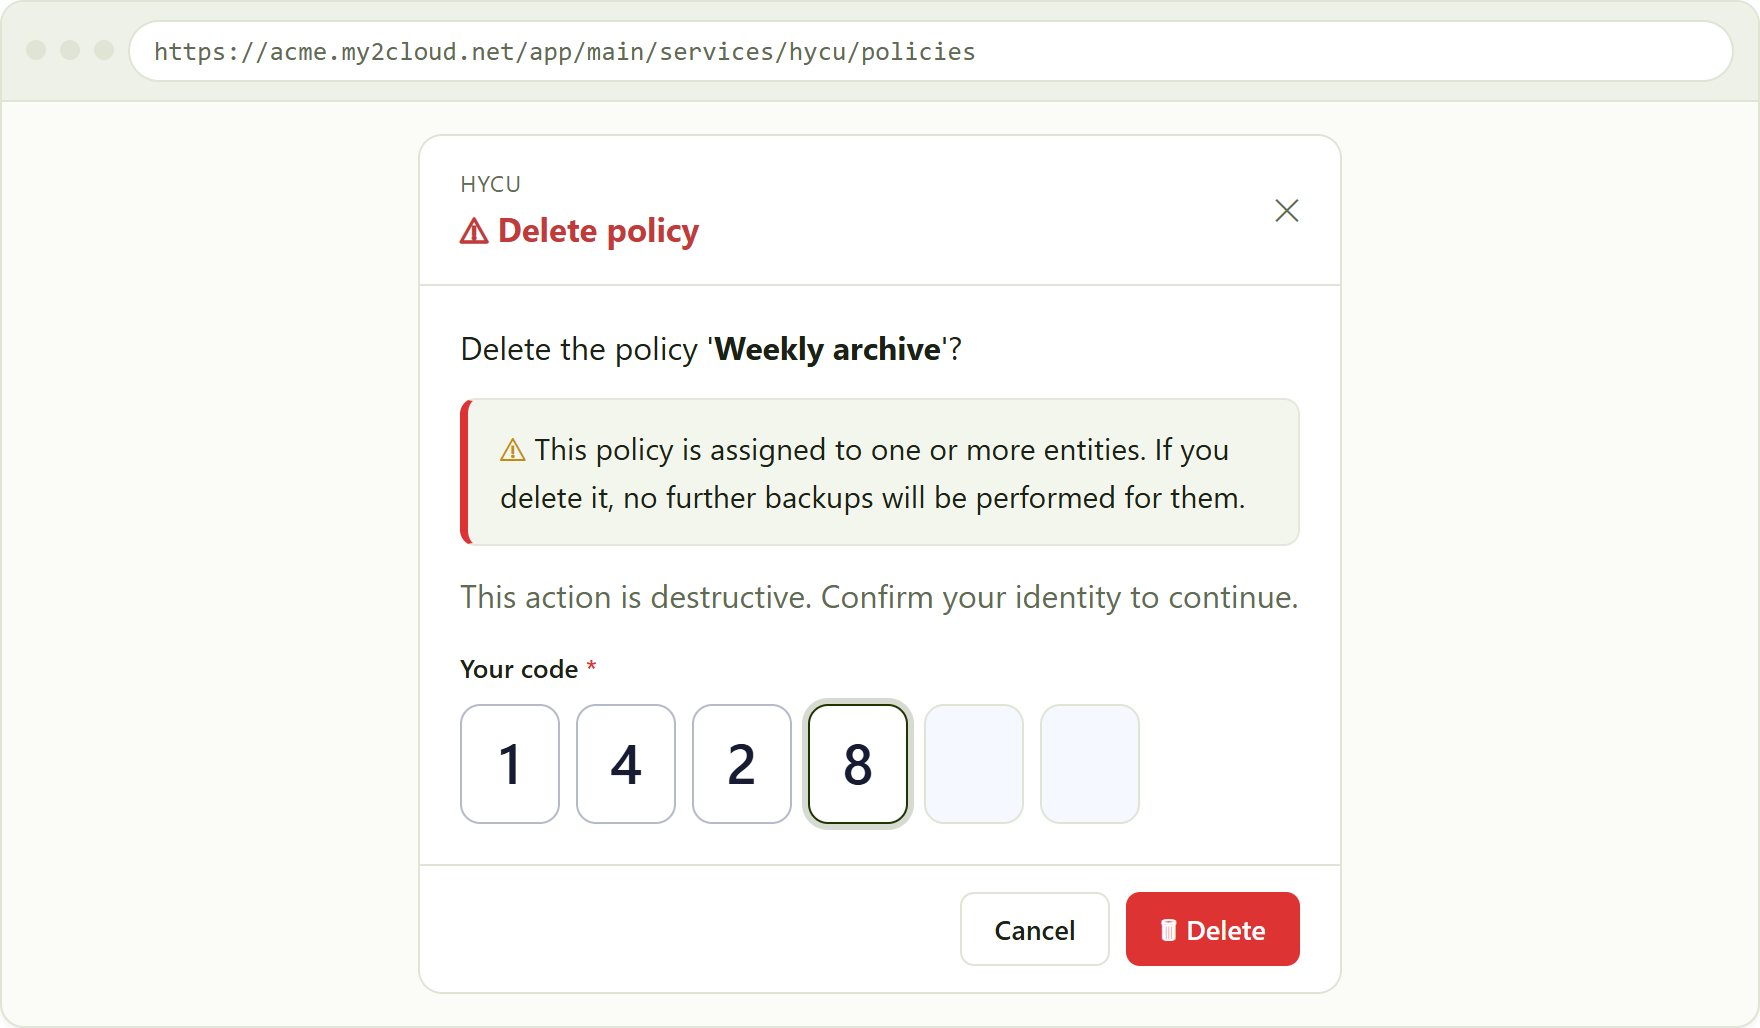
the Delete policy confirmation, with the assigned-entities warning and the authenticator-code prompt.
Assigning a policy to entities
Creating a policy does not, on its own, protect anything - a policy takes effect once it is assigned to entities. You do this from the SaaS live view, where every backed-up item is listed. Each row has an eye button to View its detail, and a cog for actions. From the cog choose Set policy.
The Set policy modal shows the entity name and a single dropdown. Pick the policy you want to apply, or choose Unassign (no policy) to remove any policy from the entity. Click Save to apply. If a chosen entity is set to unassigned it will fall back to the Account's default policy where one is set, or otherwise not be backed up until you assign one.
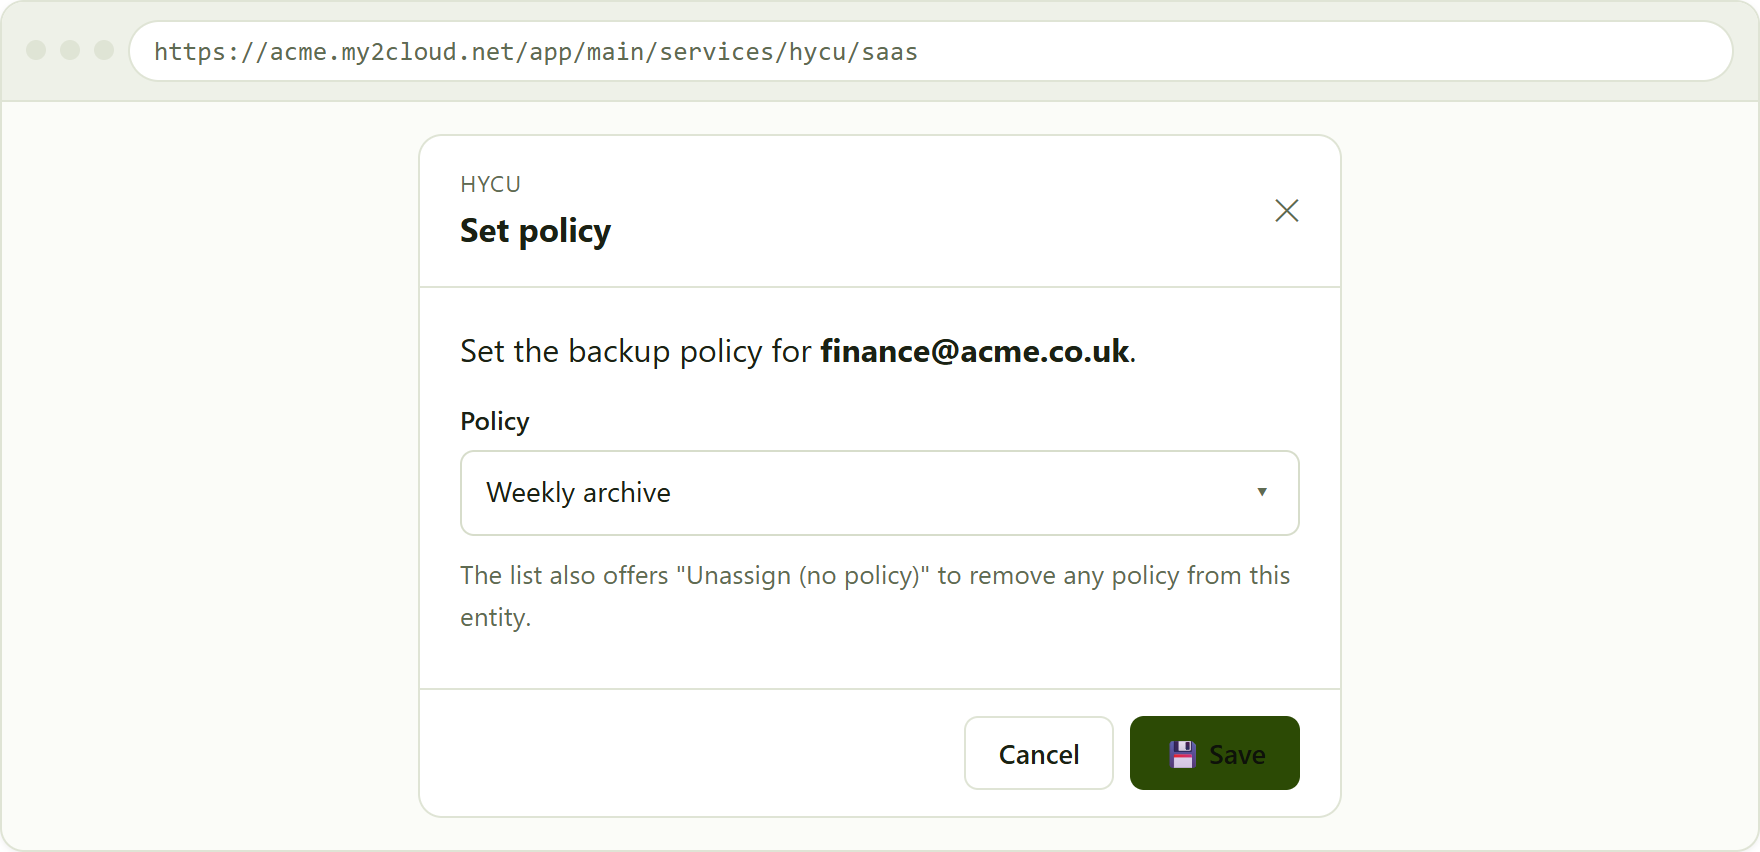
the Set policy modal on a SaaS entity, choosing a policy or unassigning.
Backup now
Policies run on their own schedule, but you can also start a backup immediately. On the SaaS live view open an entity's cog menu and choose Backup now. A short modal asks you to confirm - "Do you want to back up [entity]?" - with one option:
- Force full backup - when ticked, the run copies everything rather than only what has changed since the last backup. A warning appears: forcing a full backup increases cloud storage consumption, which may result in additional costs on your cloud account. Leave it unticked for a normal incremental run.
Click Yes to start the backup. It runs in the background; you can watch its progress on the Monitoring → Tasks live view.
Backup now is a separate capability. Because an on-demand run can add storage cost, it is gated on its own Manual Backup capability, distinct from the policy-management ones. If your organisation has policy management but not Manual Backup, you will see Set policy on the cog but not Backup now.
Who can manage policies
All of the actions in this guide are self-service management operations, and every one of them is opt-in: they are switched off by default and are only visible once your organisation has been granted the matching capability. If you do not see the Create policy button or the row cog, your organisation does not have policy management enabled - contact Assurestor if you need it.
- Account Management (the HYCU management capability) covers creating, editing, setting the default for and deleting policies, and assigning or unassigning a policy on the SaaS view.
- Manual Backup is a separate capability that covers Backup now only.
Within an organisation, an administrator can further decide which of your users hold each capability, so the exact actions you see may differ from a colleague's. The destructive Delete action always requires you to re-confirm your identity, regardless of your permissions.
Related articles
For the wider picture, start with HYCU: overview and getting started, which explains Accounts (protection sets), the live views and where policies sit in the service. To add and manage the things a policy then protects, see Managing your HYCU sources, which walks through adding AWS, Google Cloud and SaaS sources so their entities appear on the SaaS view ready for you to assign a policy and, if you need it, run a Backup now.
Tips
- Leave the starter daily policy as the default so new data is protected automatically, and add your own policies only where a different schedule or retention is needed.
- Remember a new policy protects nothing until it is assigned on the SaaS view - creating it is only half the job.
- Use the exclude policy to deliberately skip an entity rather than leaving it unassigned, so your intent is clear.
- Before deleting or editing a policy, check the entity counts in its row - a change can affect every entity assigned to it.
- Keep Force full backup off unless you specifically need a fresh full copy, as it consumes more storage.
Was this article helpful?
That’s Great!
Thank you for your feedback
Sorry! We couldn't be helpful
Thank you for your feedback
Feedback sent
We appreciate your effort and will try to fix the article